
Alerts with multiple buttons, with edit fields, Action Sheets, Activity Views, Popovers on iPad, and SwiftUI evolution
Introduction to Alerts
In iOS, there are a couple of ways to display some modal messages. To pass information to the user and optionally to get some feedback. Most used are Alerts and Action Sheets. Like secondary options are Activity Views and Popovers.
Alerts
Alerts are most used and the simplest. The UIAlertController is the most important part of it.
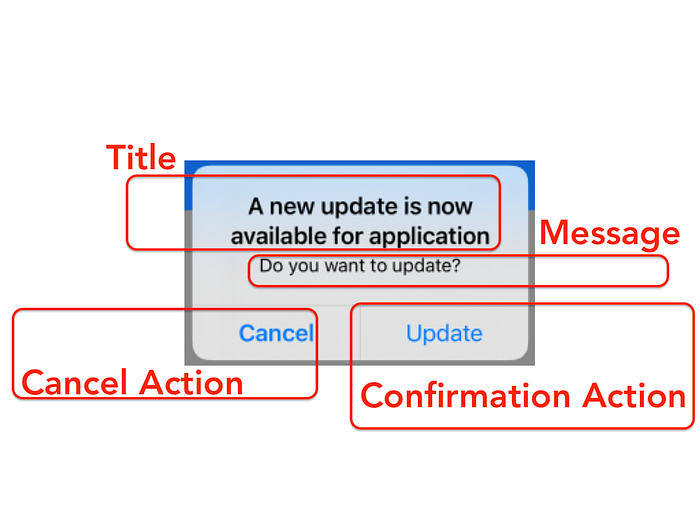
Alerts contain a couple of elements:
- Title: It represents the title. About what is the content
- Message: It represents the wider description part of the Alert
- Alert Style: It indicates the type of alert to display
- Alert Actions: These are the Action options with what users can interact with the alert or action sheet.
- Alert Textfield: It indicates the option for the user to make some input
Alerts convey important information related to the state of your app or the device. An alert consists of a title, an optional message, one or more buttons, and optional text fields for gathering input. Aside from these configurable elements, you can’t customize the visual appearance of an alert. — Apple Human Interface Guidelines
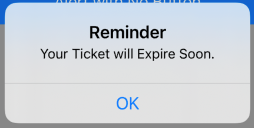
Simple Alert with Title, Subtitle, and One Button
This Alert message type is the simplest. It acts like some Info message.
The Code How to Create Simple Alert

If the message parameter gets nil as value then just one line, the title will be presented.
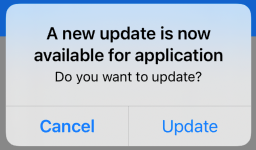
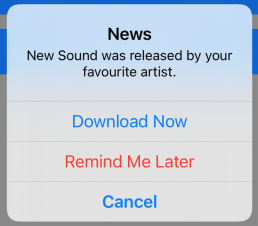
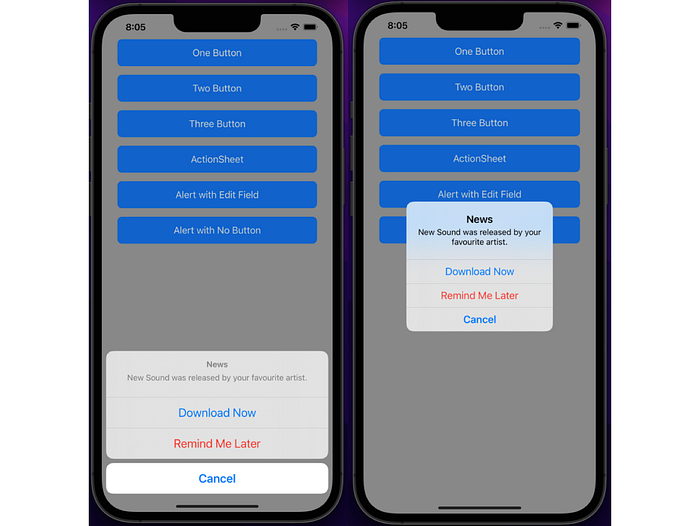
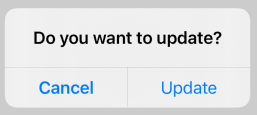
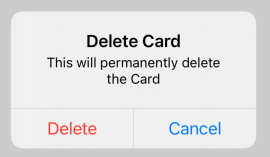
Alert Message with 2 Buttons
You can notice that the “Cancel” button is bold. This is achieved by selecting style as cancel. Also if you support previous iOS versions then this can have slight differences.
The Code How to Create Alert Message with 2 Buttons
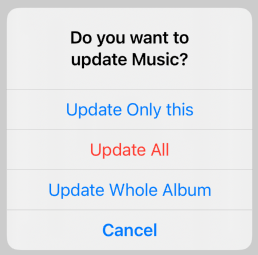
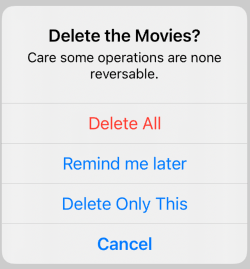
Alert Message with 3 Buttons
Previous Alert had the buttons vertically aligned. If you add 3 buttons, the system will automatically align them vertically in space.
With this Alert we have also used the destructor style, which colors the text to red. It is mostly used for some operations like Delete, Remove. Anything that can indicate to the user that this operation could do some permanent change.
The Code How to Create Alert Message with 3 Buttons
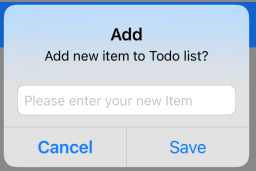
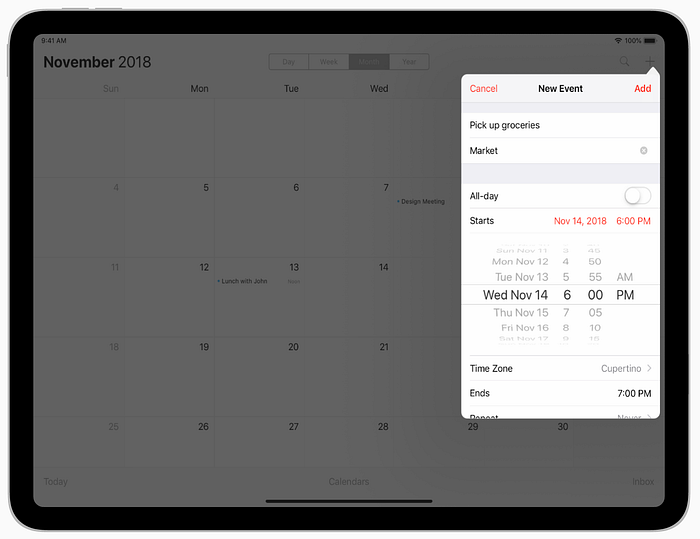
Alert Message with TextField
This is the most interesting Alert. This can be used when you want to add some item to the list. When you want to edit some user fields like name, mobile number. Any edit field.
The Code How to Create Alert Message with TextField
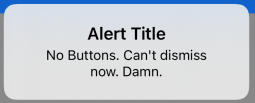
Alert Message without Button
This is possible but I have seen no use of this. This will present a message and block the screen. You can’t dismiss it.
Action Sheets
Action Sheets belong to the UIAlertController family. But it is presented from the bottom of the screen.
An action sheet presents two or more choices related to an intentional user action. On smaller screens, an action sheet slides up from the bottom of the screen; on larger screens, an action sheet appears all at once as a popover. — Apple Human Interface Guidelines
The Code How to Create ActionSheet
If you run this code on an iPad it will crash. The iPad needs to know the position of the UIAlertController as it is presented inside the popover controller. To fix this crash, we need to add the next line before presenting the Action Sheet.
alert.popoverPresentationController?.sourceView = view
alert.popoverPresentationController?.sourceRect = button.frame
Now the Action Sheet will be presented on the button from source code.
Activity Views
The system provides several standard services, such as copying items to the pasteboard, posting content to social media sites, sending items via email or SMS, and more. Apps can also define custom services. Mostly it is used for sharing content. Can handle sharing text, URLs, images etc. This is not a regular way to present some options to the user but still belongs to the “Modal” view way to communicate with the user.
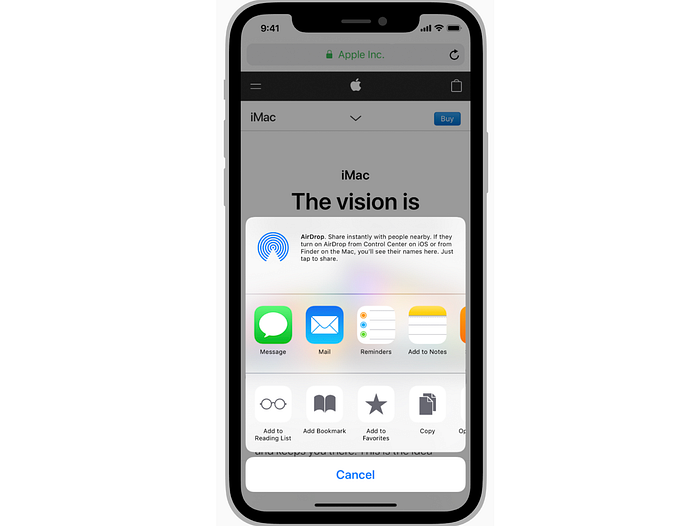
Activity Views Code Example
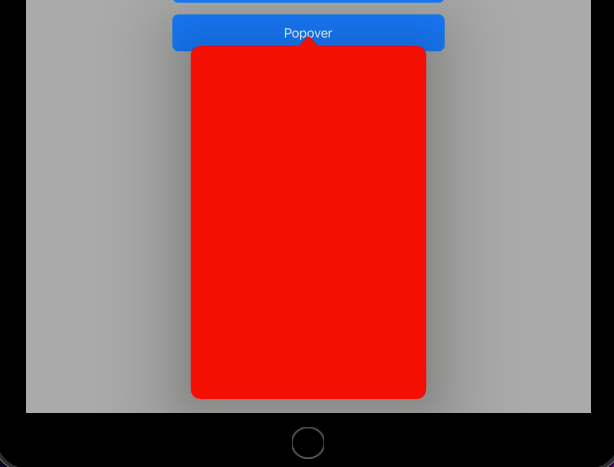
Popovers
Popovers are special ways to present content modally on iPad.
Popovers Code Example
Code examples can be found on the next link GitHub.
SwiftUI Alerts
Alerts in SwiftUI are pretty much similar to UIKit ones, which is considering the UI. As for the SwiftUI development, it depends on what iOS version you are using. Alerts are evolving and changed a couple of times from iOS 13 to iOS 15. But the principles are the same.
SwiftUI Alert with 2 Buttons Code iOS13
SwiftUI Alert with More Buttons Code iOS13
SwiftUI Alert with 2 Buttons iOS14
SwiftUI Alert iOS15
As you can see, it evolved with SwiftUI. Only what I would highlight now is that now Alerts are more customisable than the UIKit ones.
Outro
We have learned a couple of ways how to interact modally with users. Alert, Action Sheets, Activity Views, and Popover.
If you got to this point, thanks for reading. You deserve a coffee ☕️. 🙂 If you like the content please 👏, share, subscribe, buy a coffee, it means to me. If you have some suggestions or questions please feel free to comment.